screen_capture_tool_v1_6
Roy’s Screen Capture and Image Dumper tool
Step 1:
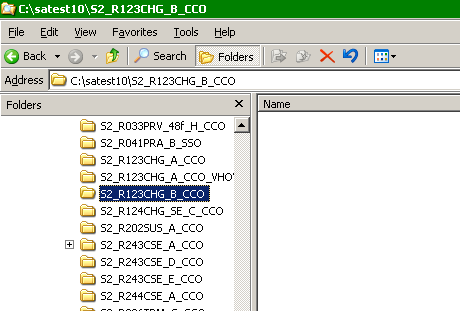
Ensure you have created an empty folder for your scenario.
Example: C:\satest10\S2_R123CHG_B_CCO
Step 2:
Install the program and launch the program
Step 3:
Click OK on the Intro Information Box:
Step 4:
Click ok on the Intro 2 Information Box:
Step 5:
Browse to select the target folder (both for fresh screen shots and for re-dumping purposes): C:\satest10\S2_R123CHG_B_CCO
Note: To kill script at any time, press Alt+S (on the keyboard) else the Cancel (GUI on screen) button whichever available.
Step 6:
Select the name for the document for which you want it to be named. Suggested is <stage>_<scenario>_<version>_<shift> . You DO NOT NEED to specify the extension. By default, part of the name has been populated which you may choose to use.
Example: S2_R123CHG_B_CCO_US_SHIFT_29DEC2008
Step 7:
If you need to just re-dump a prior unsuccessful run, click the NO button, else click Yes to proceed to the screen capture mode.
Step 8:
Enter the highest image numbering in the folder you specified, it has to be greater than 0 (Zero). Upon entering a valid value, let the program do its work and it will open a Microsoft Word Document and start dumping images sequentially.
DO NOT MOVE THE MOUSE OR DO ANY OTHER ACTIVITY WHICH MAY JEOPARDIZE THE AUTOMATIC DUMPING.
Note: This only appears if you are going to perform the re-dumping only, from pressing No from step 7.
Anything else entered like alphabets, symbols, null / empty values and negative numbers (or a combination of them) will result in an error message and will prompt for you to try again.
Step 9:
Click OK to dismiss Text Box which marks the beginning of the program’s readiness to begin capturing screen shots.
NOTE: the program runs silently in the system tray with the icon.
Note: You may left click this icon (and a menu shows up) in the system tray to pause / resume the script also.
Step 10:
To Capture once per snap / screen shot, press your keyboard Function button 10 aka F10. A brief text bubble next to your mouse pointer will let you know that you have successfully captured the incrementing sequence # image, and it will self dismiss:
You will notice that the files are captured sequentially starting with 1.jpg:
To kill script at any time, press Alt+s (on the keyboard) else the Cancel (Message Box on screen) button whichever available.
Step 11:
If you are done capturing and ready to compile screen shots, Press F9. Click Yes if you are indeed done, No to return to Screen Capture Mode. A new Microsoft Word Document and it will automatically start dumping the images sequentially, saving the MS Word Doc as a *.doc and automatically exits.
PLEASE NOTE: DO NOT do any other operation on your computer while this script is dumping the images. Make sure ALL WINDOWS are minimized, even when you press F9 and some windows show up again, minimize them.
Note: you may see this screen when you press F9 when you have not captured any images. Please capture one image else Alt+s and kill the program.
Step 12:
The program will check if you need to perform the re-dumping of the current screen capture run in case it was not successful. Click Yes to Exit, and No to re-dump.
This can be performed multiple times until satisfied.
Click Yes from above:
Click Yes from above (this will self dismiss in 3 seconds):

Comments
Post a Comment